SOAP 2.0 | Profiles
- 18 Mar 2024
- 7 Minutes to read
- Print
- DarkLight
- PDF
SOAP 2.0 | Profiles
- Updated on 18 Mar 2024
- 7 Minutes to read
- Print
- DarkLight
- PDF
Article Summary
Share feedback
Thanks for sharing your feedback!
Overview
Creating standard profiles for common focuses of care or payer-specific needs (i.e. worker’s compensation) can save you time.
Templates & Profiles
In SOAP 2.0, Templates and Profiles are complementary features. Templates are the default foundation for all note types and are applied at the company-level. Profiles allow therapists to add additional documentation fields tailored to the patient’s treatment plan and are applied at the individual note-level. For example, a rotator cuff profile could be created containing the required fields for diagnosis and treatment related to that specific ailment, which would layer on top of the PT Initial Evaluation template. Similar to Templates, Profiles can only be created by Company Admins.
There are key differences between Profiles and Templates. Templates allow you to add and remove content, while Profiles only allow you to add content to notes. If the Template specifies that Medical History must be included, adding a profile that does not include Medical History will not remove that subsection from your note. Unlike Templates, Profiles are not tied to a specific note type or discipline, and a Profile created for the company can be applied to any note, regardless of therapist specialty. In addition, you can also include sets of specific procedures, problems, and goals into your profiles with Advanced Profile Options.
In addition to creating profiles for common focuses of care, use profiles to create a custom flowsheet.
Discover more about Custom Flowsheet Profiles.
Click the arrow or colorblock below to discover more.
User Permissions
User Permissions
Depending on the permission enabled for your user profile, you may have full access or restricted access to create and edit templates and profiles. If you do not see the Profiles/templates features, your user permission may need to be updated. Review the instructions below to ensure appropriate access is given to your clinic and users.
Enabling Editing Clinic Profiles
Users who need to Edit or Share company profiles will need the User Permission Edit SOAP 2.0 Template/Profiles, enabled within the user manager menu.

Discover how to update these permissions.
Turn-Off My Profiles (Personal Profiles)
Company Admins have the ability to enable/disable My Profiles to ensure documentation consistency throughout the clinic. Use the toggle option found beneath your User avatar to turn off or turn on My Profiles across your clinic.

Permissions vs. Feature Availability
Use the table below to determine what features are available to users based on their profile permissions.
| Permision Level | Feature Availability | ||
|---|---|---|---|
| Company Templates | Company Profiles | Personal Profiles | |
| Company Admin | Yes | Yes | Yes |
| Template/Profile Manager | Yes | Yes | Yes |
| All Other Users | No | Read Only | Yes - unless clinic disabled access |
My Profiles (Personal Profiles)
My Profiles (Personal Profiles)
My Profiles are User customized profiles associated with the User account you use in SOAP 2.0. These profiles belong to the User unless you choose to share them with a Company and have the Edit SOAP 2.0 Template/Profiles permission.
Company Admins have the ability to enable/disable these profiles to ensure consistency throughout the clinic. My Profiles are accessible from the WebPT EMR Dashboard Company drop-down menu under SOAP Templates.

For example, you like the Company Hip profile but need to make modifications to use it. You can copy the profile and add it to My Profiles where you can make the necessary changes.
Tip
My Profiles will automatically transfer to any clinic you have access to.
Creating a Profile
Creating a Profile
Let’s create a Profile.
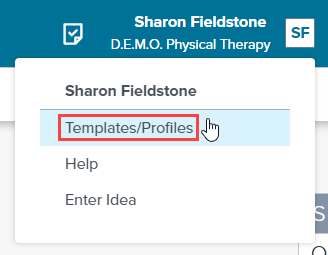
Click Templates/Profiles from the drop-down menu below your avatar (name) in the upper right.
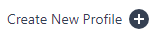
Find the Profiles section under WebPT Templates. Click Create New Profile to get started.
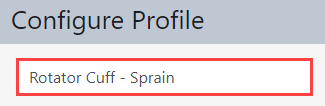
Give your Profile a title. Providers will use this title to find the Profile and add it to their note, so be as specific and descriptive as possible.
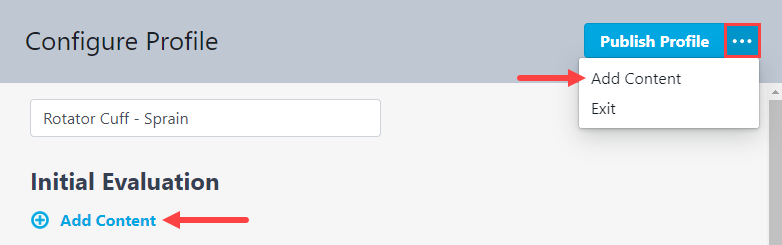
Select Add Content to edit the subsections on the Profile. When building Profiles, you can only add or remove subsections in the Content Drawer.
 Add Subsections
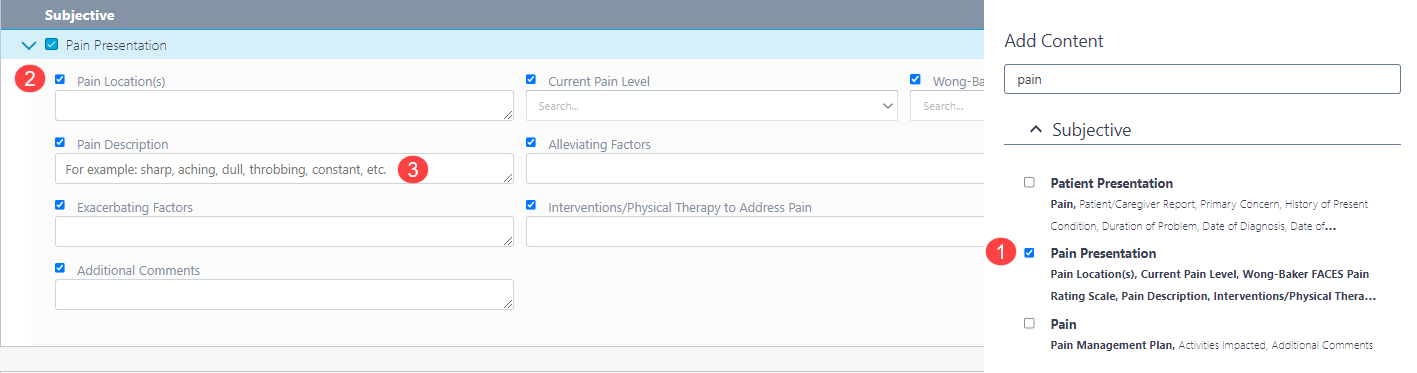
When a subsection is added, all fields within the subsection are added as well. Visit the subsection and use the checkboxes to remove any unwanted fields.
In the Content Drawer, enter keywords in the Search Content field. Use the checkboxes to add or remove subsections to the Profile. Discover more about about adding content.
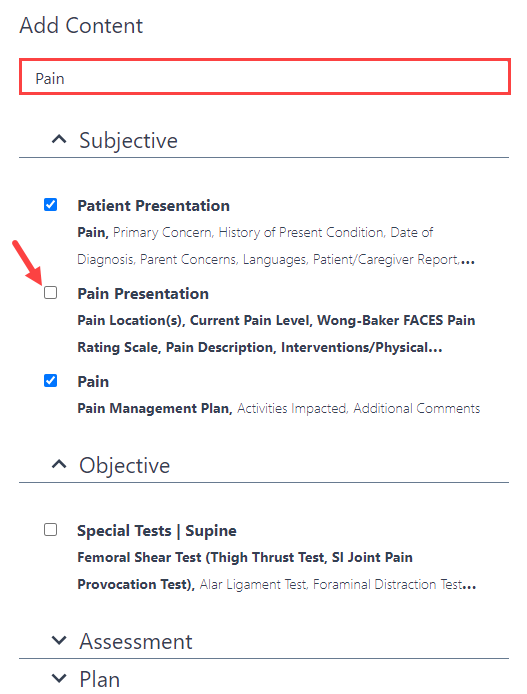
Add and remove subsections in the Content Drawer: (1) Fields are individually selected in the Profile builder. (2) All fields are selected by default when you add a subsection to a Profile. (3) You can add text to Text fields to include when a Profile is applied to a note. Discover more about Advanced Profile options.
Use the buttons next to the subsections to select what content appears on Evaluative note types (Initial Evaluation, Progress Note, and Discharge Summary) or All note types. The selection defaults to All.
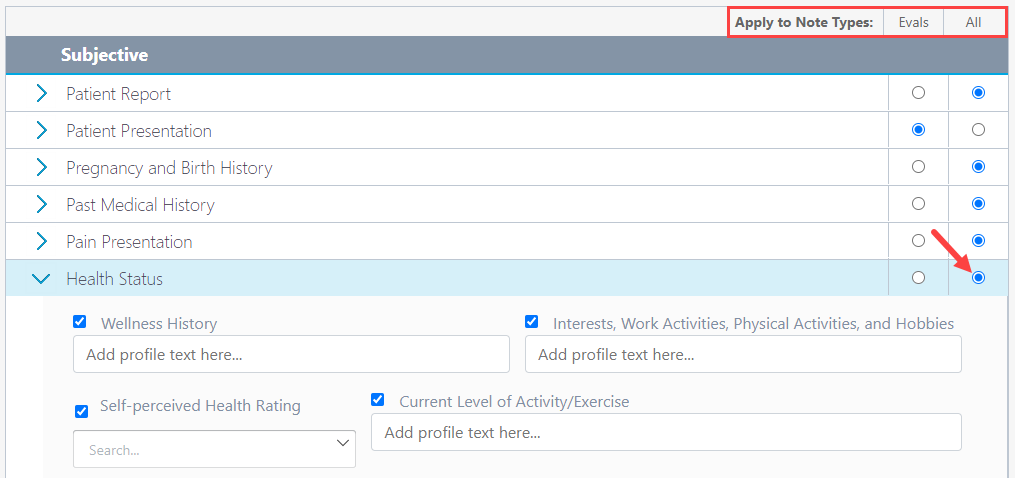 Subsections
You can only choose whether a subsection (and the individual fields you've selected) appear on Eval notes or All notes. You cannot choose to have specific fields within a subsection appear on an Eval and other fields within that subsection appear on All note types.
DuplicatesDon't worry about duplicates. Any fields the note and profile have in common will only appear once.
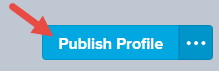
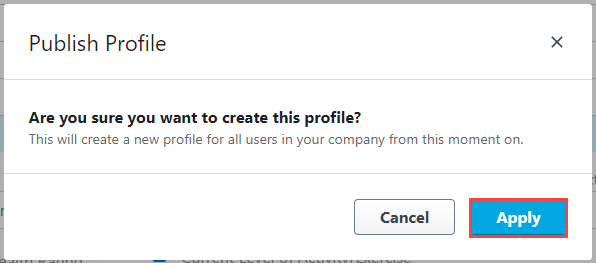
Once you’ve added all the content for your profile, click Publish Profile.
A dialog box will ask you to confirm your selection, click Apply.
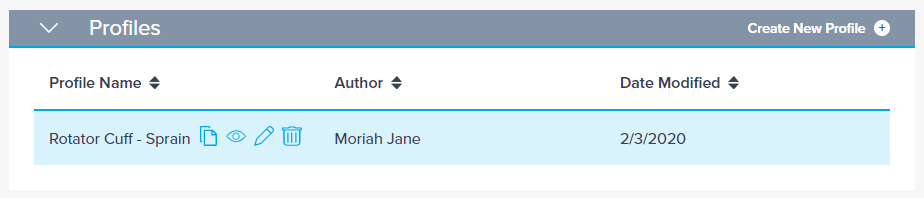
The profile appears in your Profiles section. Here, you can view the Profile Name, Author, and the Date Modified for each profile. You can also Copy, View, Edit, or Delete the profile by hovering over the template and selecting the appropriate icon.


View, Copy, & Share Profiles
View a Profile (Profile Preview)
Profiles have very cool functionality, which allows you to view the profile on top of the default or Company Template for a particular user type and note type.
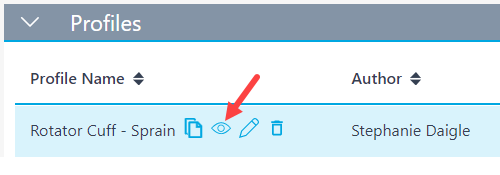
Hover over the profile, and select the View (eye) icon.
Choose a Note Type and Discipline using the drop-down menus from the Profile Preview page.
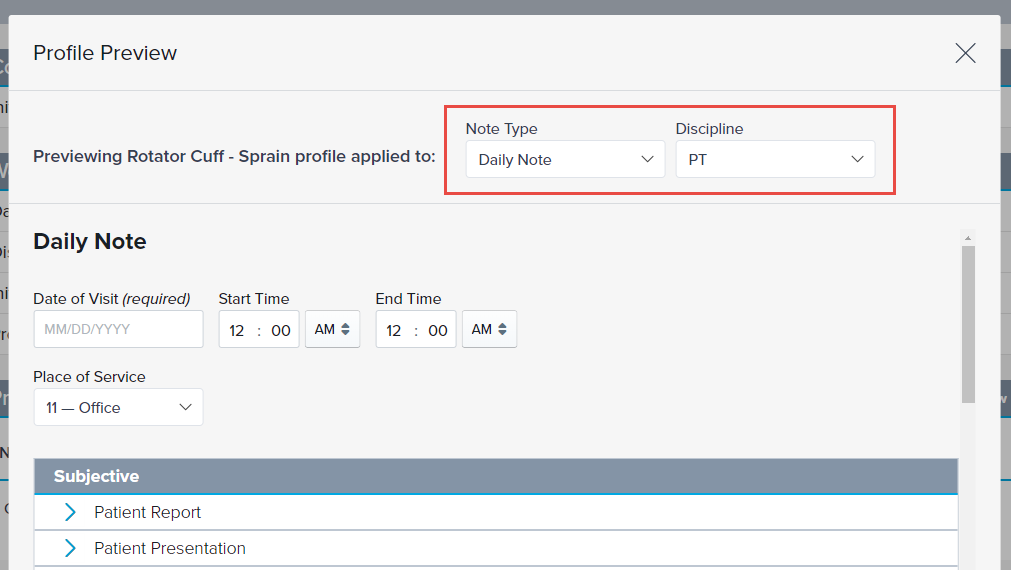
Review how the subsections and fields you've chosen in your profile align with the template and desired outcome for the profile. Discover how to add a profile to your note.


Copy a Profile
You can save time configuring Profiles by copying a WebPT Profile, Company Profile, or My Profile to use as a starting point.
WebPT Profiles, Company Profiles, and My Profiles are found in the Profiles section under WebPT Templates.

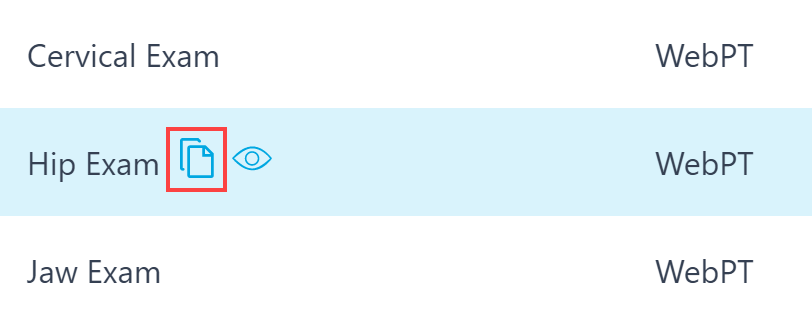
Open one of the profile sections to find the profile you would like to copy.
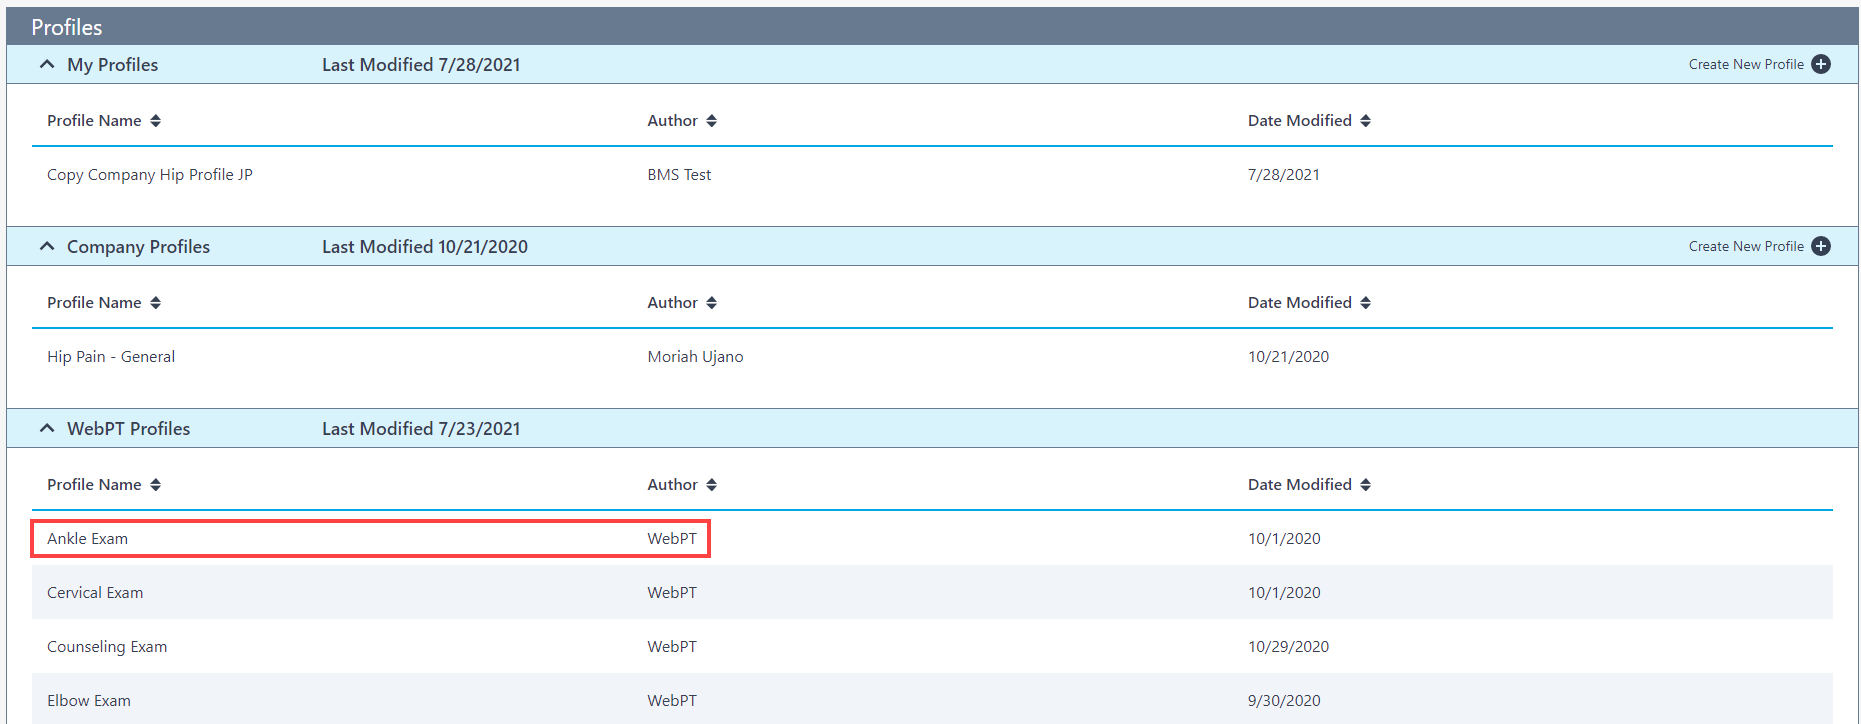 WebPT Profiles
WebPT Profiles indicate WebPT as the author. Company and My Profiles will indicate the author in the Author column.
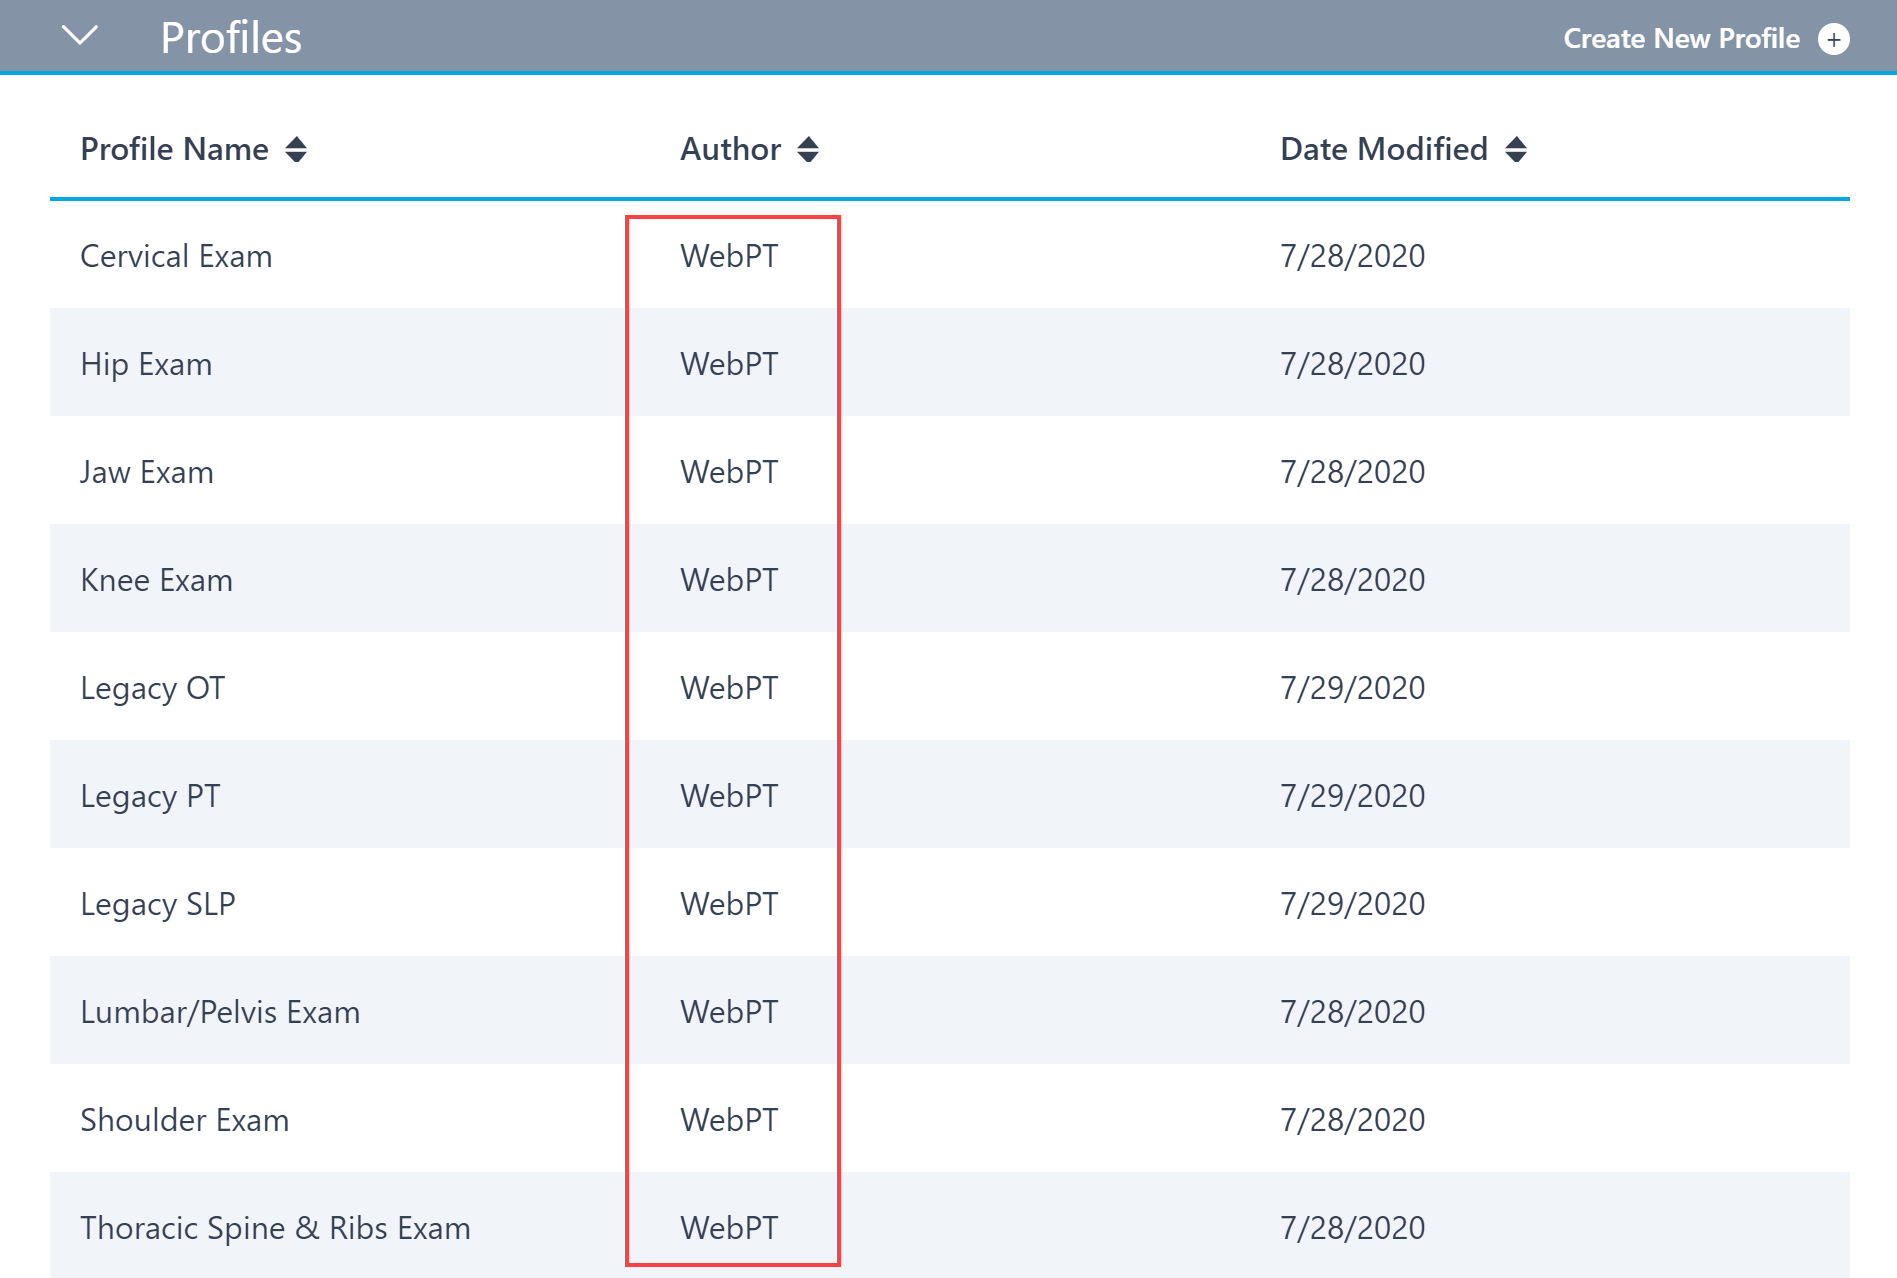 Legacy Profiles
Several legacy profiles (Legacy OT, Legacy PT, Legacy SLP) contain many of the subsections in the Objective section. If you are in a SOAP note and find you are missing content fields, select one of these profiles to meet your documentation needs.
Hover over the profile, and select the Edit page icon.
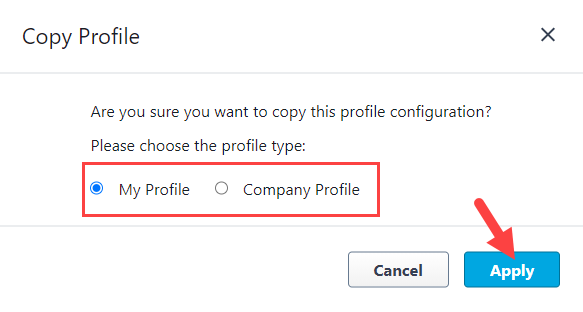
Confirm you want to copy the profile and which profile section to copy it to, My Profile or Company Profiles (User permission required). Click Apply.
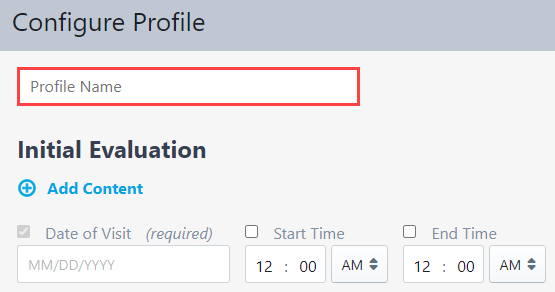
Name Your Profile: At the top of the Configure Profile page, add a title to your new profile in the Profile Name section. Providers will use this title to find the Profile and add it to their note, so be as specific and descriptive as possible.
Add/Remove a subsections: Select Add Content to access the Content Drawer and enter keywords in the Search Content field. You can use the checkboxes to add or remove subsections to the Profile.
Add/Remove subsections in the Content Drawer:
(1) Fields are individually selected in the Profile builder.
(2) All fields are selected by default when a subsection is added to a Profile.
(3) Text fields can have text added that will be included when a Profile is applied to a note. Discover more about Advanced Profile Options.
Use the buttons next to the subsections to select what content appears on Evaluative note types (Initial Evaluation, Progress Note, and Discharge Summary) or All note types. Remember, this is a copy of an existing Profile, so the selections displayed are the same as the Profile that was copied.
Click Publish Profile when you are finished with your selections.


The new Profile will be in the Profiles section.

Share a Profile
Save time and share Company Profiles or My Profiles with your clinic network to use as a starting point. Only users with the Edit SOAP 2.0 Template/Profiles will be able to share existing profiles. If you do not have access contact your company administrator to update this User permission.
Hover over the profile, and select the Share icon.

Choose the Company or Companies you want to share your profile with from the Choose Company drop-down.
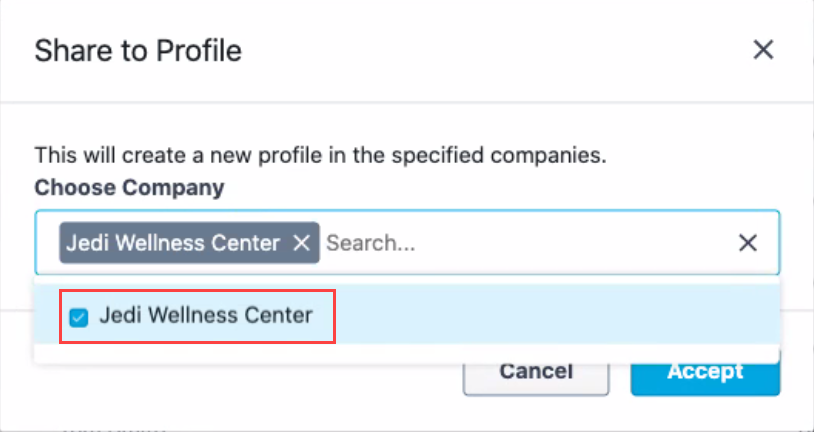 Company Access
Only companies you have access to will be listed in the drop-down menu for sharing.
Click Accept. A confirmation message appears at the bottom of the page, indicating the profile share was successful.


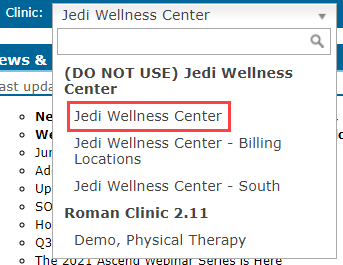
Want to verify the the profile was shared successfully?
Choose the clinic location you shared the profile to, from the Clinic drop-down menu on the WebPT EMR dashboard.
Go to the Clinic Menu and click SOAP Templates.
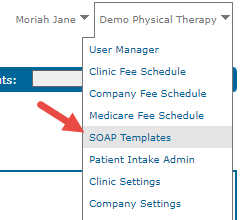


The new profile you shared should be listed in the Company Profile section.
Was this knowledge article helpful?