SOAP 2.0 | Fax and Batch Fax
- 05 Apr 2024
- 3 Minutes to read
- Print
- DarkLight
- PDF
SOAP 2.0 | Fax and Batch Fax
- Updated on 05 Apr 2024
- 3 Minutes to read
- Print
- DarkLight
- PDF
Article Summary
Share feedback
Thanks for sharing your feedback!
Overview
WebPT's Print and Batch Print features makes faxing notes easier. Simply select the checkbox for the note you want to fax, and hit Send. Need to fax multiple notes? Batch Fax will do the trick. Just select the checkbox at the top to send all finalized notes. You can easily find recipients using the Contact Search field, and even add eDocs from the patient's chart. Plus, all referring physicians are automatically included as recipients. You can review your fax details, including recipients and custom messages before sending. And don't worry about large files; WebPT splits them into manageable messages for successful delivery. Faxing with WebPT is efficient and hassle-free.
Click the arrow or colorblock below to discover more.
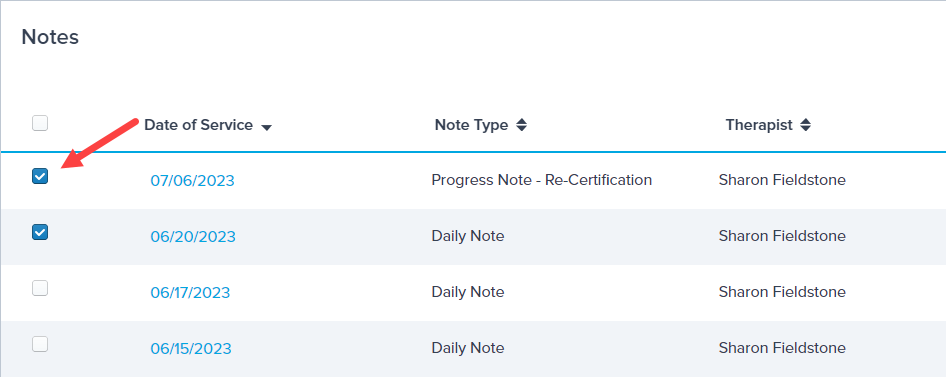
Faxing Notes
Faxing Notes
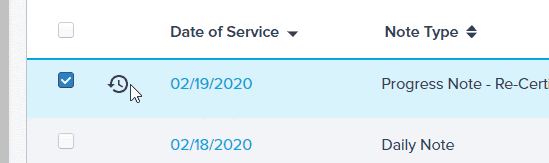
Select the checkbox for the note (or notes) you'd like to fax.
 Batch Fax
Select the checkbox in line with the column headings to select all finalized notes.
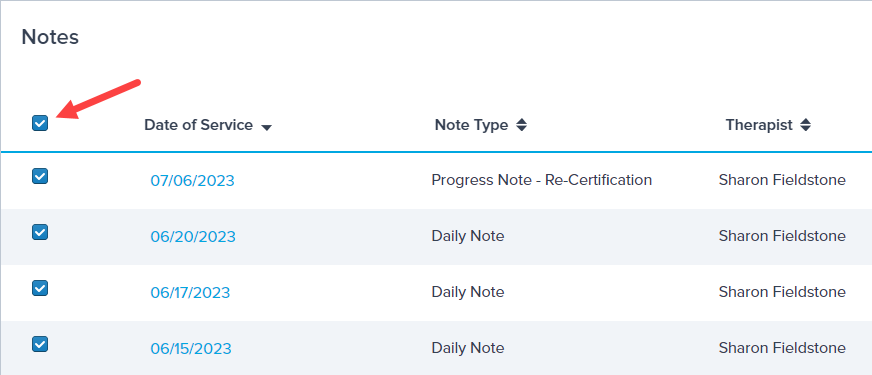
Click Send.

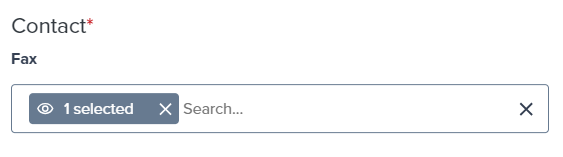
Use the Contact Search field to find the desired recipients. As contacts are selected, they will appear below.
 Referring Physicians
All referring physicians added to the patient’s case populate as recipients in the fax modal.
Select eDocs to add to the fax. Once you have selected the notes to fax, you can choose to include any electronic documents saved to the patient chart.
 eDocs Only
You’ll need to send the fax directly from the eDocs section of a patient’s chart to send a fax containing only eDocs.
Review your fax.
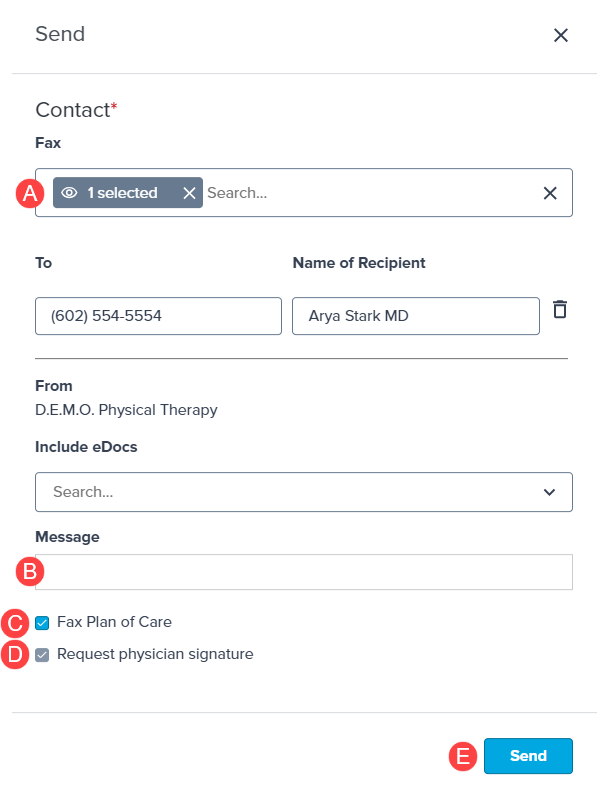
a. Confirm all recipients and fax numbers are correct. If there are any errors in the Contact Display area, you will not be able to fax the note.
b. If desired, You can enter a custom Message.
c. Choose if you want to Fax Plan of Care (available for Evaluative Notes only). This only sends the Assessment and Plan portions of the note.
d. Select the Request physician signature checkbox if you need to request the physician’s signature. This adds a note to the cover sheet indicating the physician needs to sign the document and includes a signature line on the note. When faxing a single Plan of Care, this checkbox is selected automatically.
e. When ready, click Send Fax.The fax cannot be sent until a contact is selected.
A fax indicator appears next to your notes to give you quick insight into the status. Simply hover to reveal.
The indicator will turn red if the fax fails.
a. A cover sheet with the clinic's demographic information and message generates automatically.
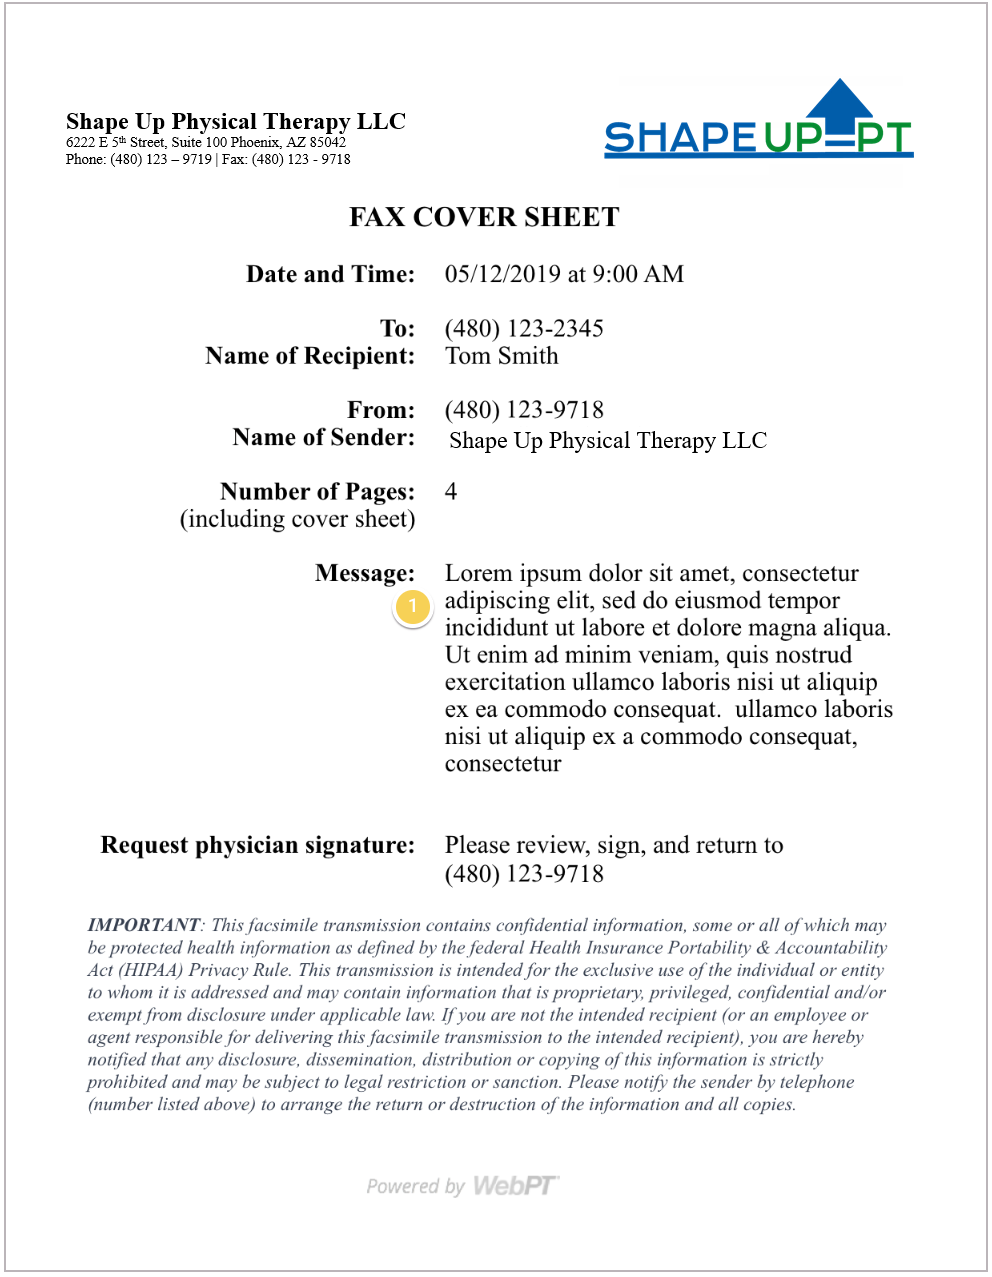
b. The patient’s full name and date of birth appear in the header of each page to help identify who the note belongs to in case the faxed pages get separated from the cover sheet for any reason.


Fax Plan of Care
Fax Plan of Care
You can fax Plans of Care for your finalized evaluations. This option allows you to send the Assessment and Plan sections of the note. The Physician signature line will be included by default.

The Fax icon label helps you identify whether a POC has been faxed. Once a Plan of Care has been faxed to a referring physician, the fax icon label appears.

Fax Splitting
Fax Splitting
A single fax can handle up to 15 MBs of files. In order to prevent large faxes from failing, the WebPT EMR divides the fax into separate messages in order to successfully send all the selected documents. Once all the messages have been divided, they can be seen under the original fax in the Outbound Communication Log:

Document Type
eDocs shows as their Document Type (MRI, X-Ray, Driver’s License, Other, etc.) instead of by the name of the document.
Was this knowledge article helpful?